Introduction
Creating a half-filled star in Figma is not only easy but also a fun way to enhance your design skills. I remember finding it challenging during one of my projects and, despite my research, I couldn’t find the right instructions. So, I took matters into my own hands and figured it out. Now, I’m excited to share this simple and effective process with you!
In this tutorial, I’ll also show you how to turn your half-filled star into a component, making it easy to save and reuse in any of your future projects. Don’t worry if you’re not familiar with these terms—this guide will walk you through everything. Whether you’re facing the same challenge or just exploring Figma for fun, this step-by-step guide will help you master the technique with ease.
Let’s dive in and create something amazing together!
Step 1: Setting Up Your Project
- Start by creating a new frame in Figma, or you can work directly on any existing canvas. The choice is yours!
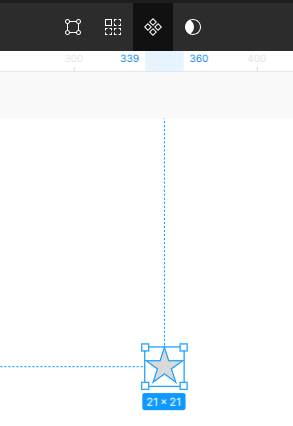
Step 2: Drawing the star
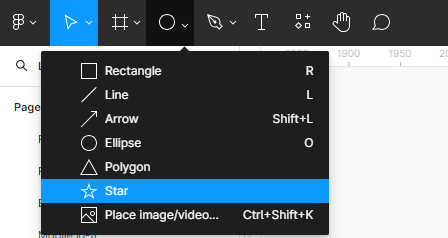
- Select the Star Tool from the shape menu and draw a star on your canvas.
Step 3: Create a Component:
- With your star selected, click the “Create Component” button or press Ctrl/Cmd + Alt + K. Name your component Star Component.
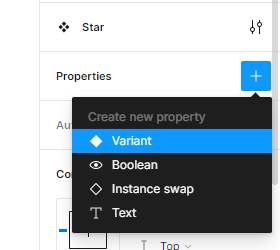
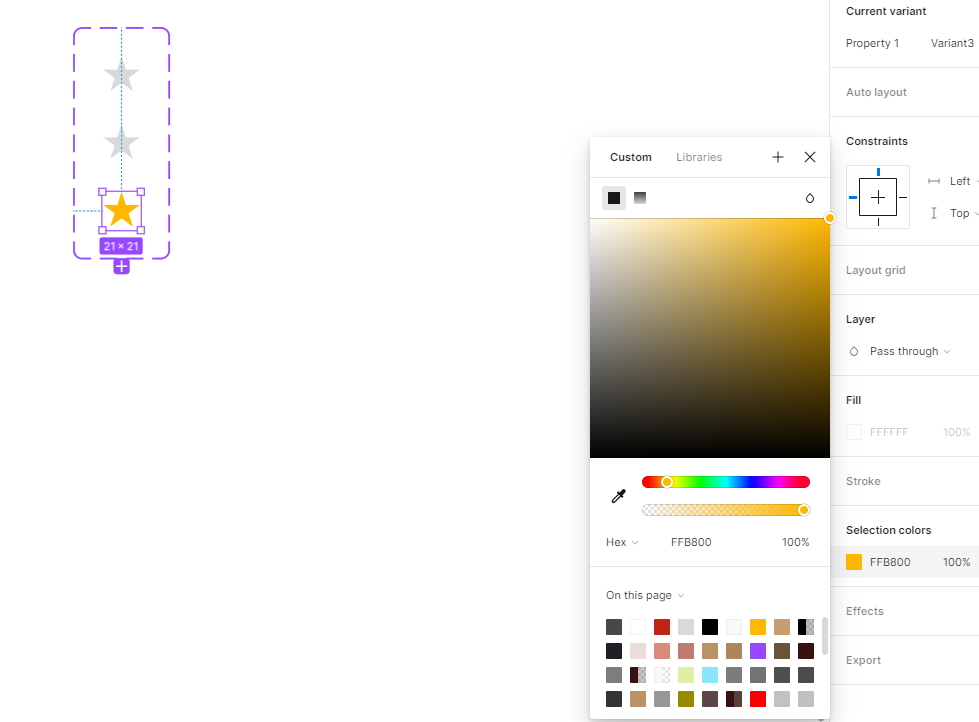
Step 4: Make Variants
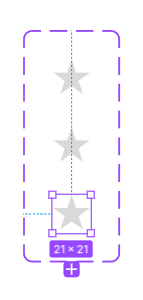
- In the left side menu, navigate to the properties section of your “Star Component”. Click the ”+” sign and select “Variant”. This will allow you to create different versions of your star within the same component. Click on ”+” and make 2 more stars.
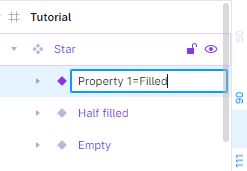
Step 5: Naming the star variants
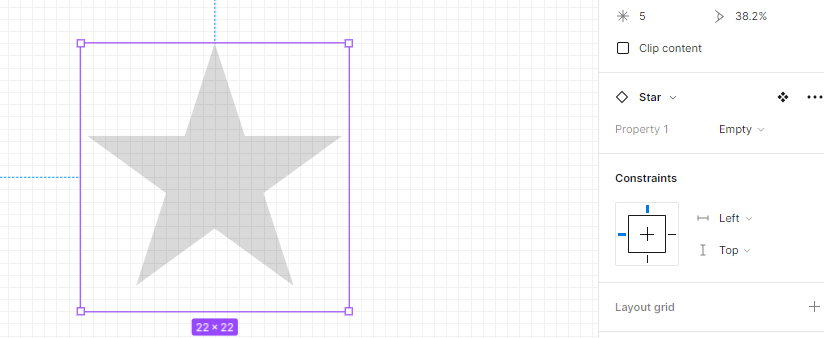
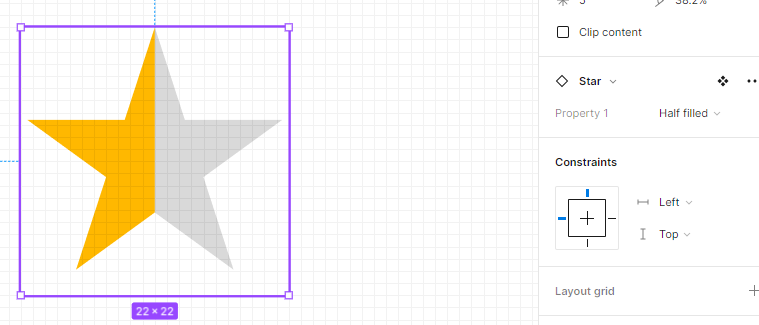
- Rename Your Variants: In the right panel, you’ll see the default names for your variants. Set the property names to “Empty”, “Half-filled”, and “Filled” (e.g., property=Empty).
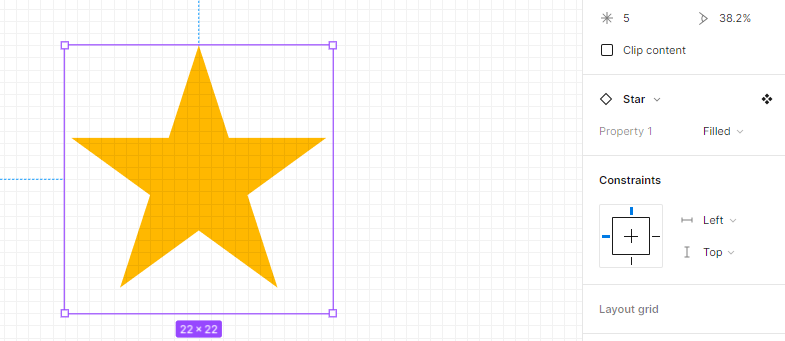
- Fill the “Filled” Star Variant: Select the star named “Filled” and apply your desired fill color to it.
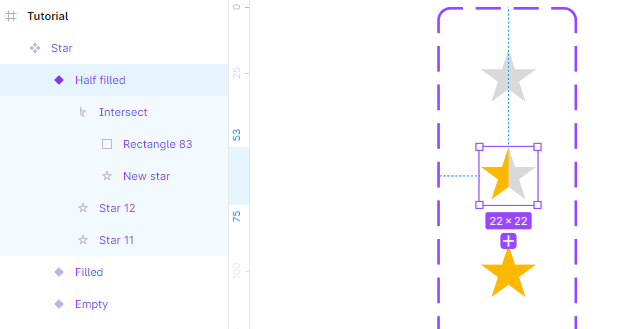
Step 6: Creating Half Star Variant
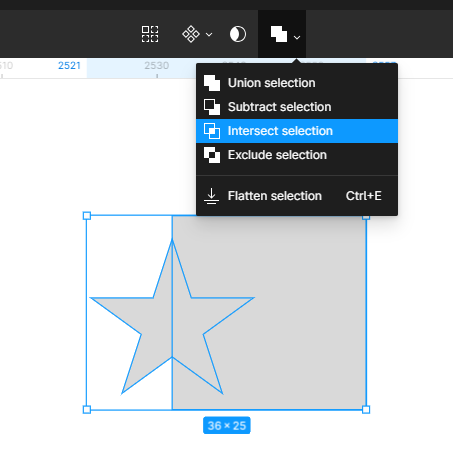
- Create a New Star: Select the star shape and create another star with the same dimensions. Name this new star “New Star”.
- Add a Rectangle: Select the Rectangle tool or press Ctrl+R and draw a rectangle. Position the rectangle over the left side of the “New Star” as shown in the figure.

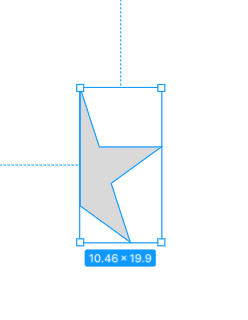
- Intersecting Shapes: Select both the star and the rectangle, then click the “Intersect Selection” tool from the toolbar. This will give you a half-cut star.
Step 7: Assembling the Half-Filled Star
- Color the Half Star: Drag the half-filled star from the component onto your canvas and fill it with any color you like.
- Overlay the Cut Half Star: Place the cut half star above the colored half star.
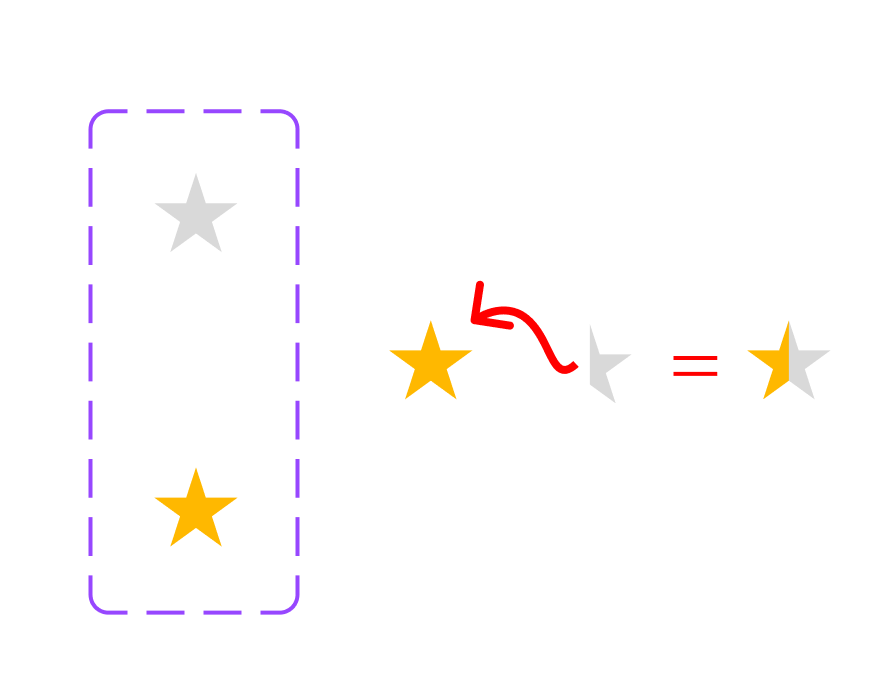
- Reassemble into Component: Select both the half-filled star and the cut half star, then move them back into the “Star Component”.
Step 8: Using Your Star Component
- Access Your Component: Navigate to the Assets panel where you’ll find your “Star Component” ready to use.
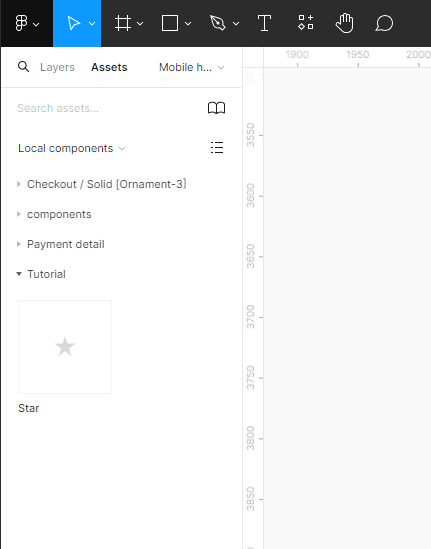
- Drag to Canvas: Drag the component onto your canvas.
- Customize Properties: You can now change any property you like, such as switching between the “Empty”, “Half-filled”, and “Filled” variants.